
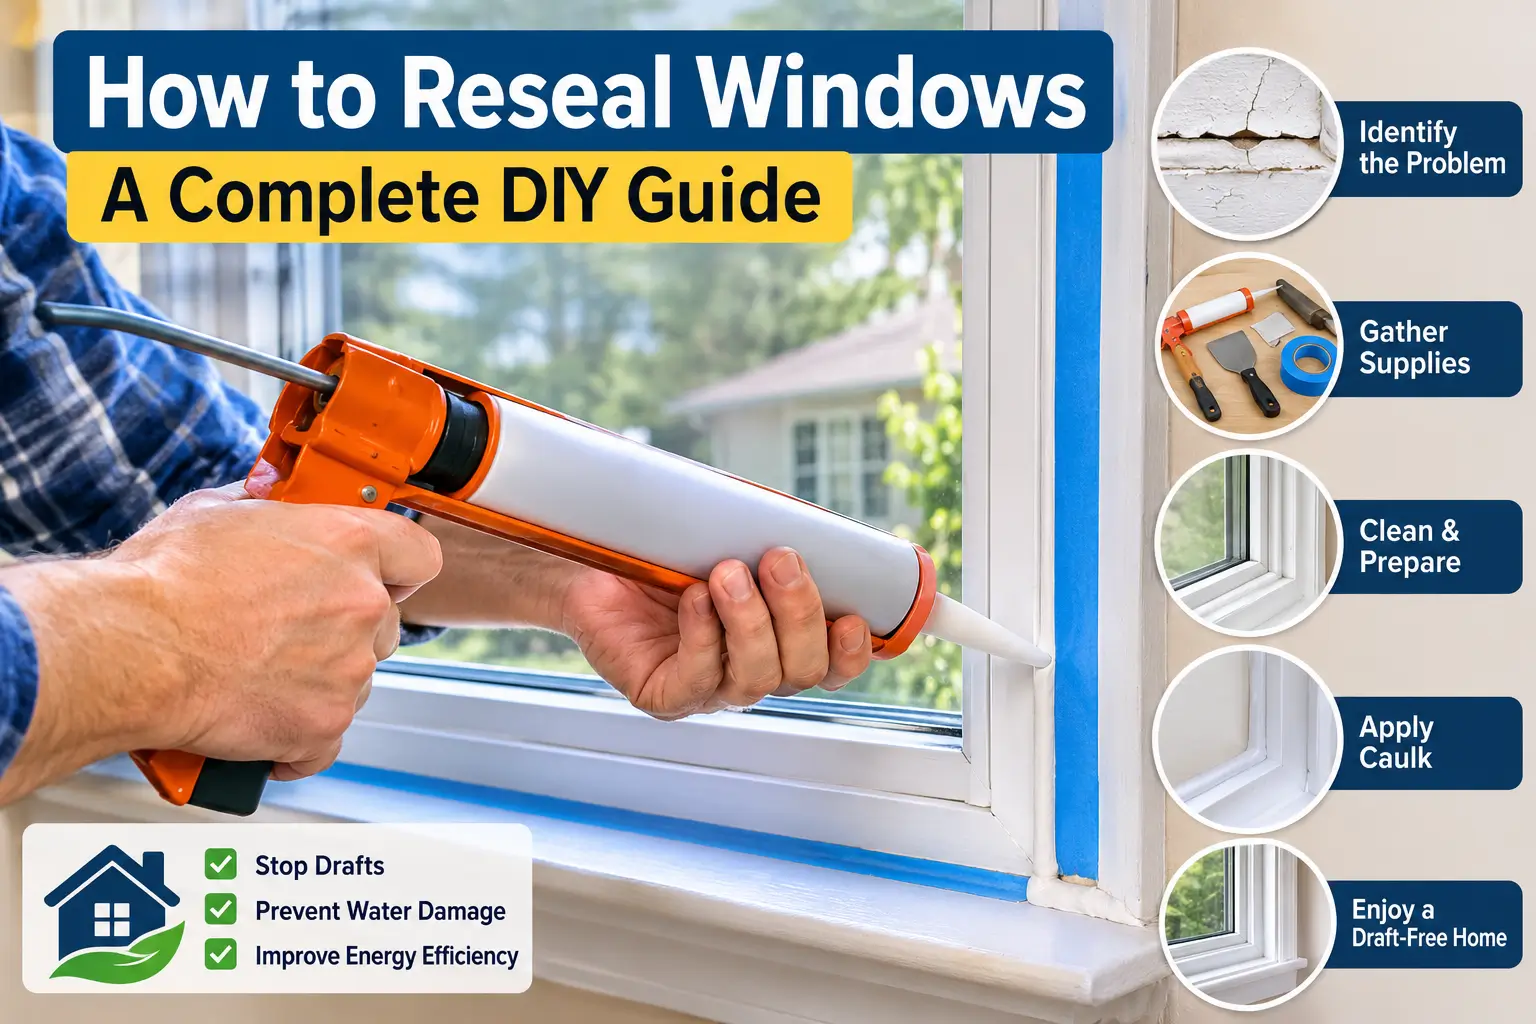
How to Reseal Windows: A Complete DIY Guide
Drafty windows can make your home uncomfortable throughout the year. They can also allow moisture, dust, and insects inside. Damaged seals often cause these problems. Fortunately, many window sealing issues are simple to fix.
Learning how to reseal windows starts with identifying the source of the problem. Some gaps need fresh caulk. Others require new weatherstripping or insulation. Using the wrong material can waste time and money.
This guide explains how to inspect, prepare, and reseal different window areas. You’ll learn which products to use and which mistakes to avoid. We’ll also explain when a window needs professional repair instead.
Can You Reseal Windows Without Replacing Them?
Yes, many windows can be resealed without replacing the entire unit. The right repair depends on the damaged area.
Old exterior caulk often develops cracks or separates from the frame. Replacing it can stop air and water from entering around stationary joints. Worn weatherstripping can also cause drafts around movable window sections.
However, not every window seal can be repaired with caulk.
Double-pane windows contain two glass panes separated by a sealed space. This space often contains insulating gas. When its factory seal fails, moisture can enter between the panes.
You may notice fog, haze, or condensation that won’t wipe away. Applying exterior caulk cannot repair this problem. A glass professional may need to replace the insulated glass unit.
Before buying supplies, determine which seal needs attention. This simple step helps prevent unnecessary repairs.
Signs Your Windows Need Resealing
Windows usually show several warning signs before their seals fail completely. Inspect each window carefully, both inside and outside.
1. Cracked or Peeling Caulk
Old caulk can become brittle after years of temperature changes. It may shrink, crack, or pull away from the frame.
Look for visible gaps along the window trim and surrounding siding. Even small openings can allow moisture and outside air through.
2. Cold Air Around Closed Windows
A noticeable draft often indicates an air leak. Move your hand slowly around the window edges on a windy day.
Pay attention to the corners, meeting rails, and lower sash. These areas can develop gaps as materials age.
3. Condensation Between Glass Panes
Fog trapped between double-pane glass usually indicates a failed insulated glass seal.
First, clean both accessible glass surfaces. If the moisture remains between the panes, ordinary window caulking won’t solve it.
4. Peeling Paint or Water Stains
Water entering around a window can damage nearby materials. Look for peeling paint, swollen wood, stained drywall, or soft trim.
These signs may indicate a larger moisture problem. Find and correct the water source before applying fresh sealant.
5. Loose or Damaged Weatherstripping
Weatherstripping creates a flexible seal around movable window sections. It can flatten, tear, shrink, or become detached.
Close the window and inspect the contact surfaces. Replace damaged weatherstripping with a compatible product.
6. Dust, Insects, and Outside Odors
Small openings can allow dust, insects, and outdoor odors inside. Check the corners and joints around each window.
These symptoms don’t always mean the exterior caulk has failed. The opening may need new weatherstripping or a deeper air seal.
How to Find Where Your Window Is Leaking
Before starting repairs, locate the exact source of the leak. A careful inspection helps you choose the correct repair method.
Perform a Visual Inspection
Start by examining the window frame and surrounding wall. Look for cracked caulk, missing sealant, and damaged weatherstripping.
Check the interior trim for stains or peeling paint. Examine the exterior joints for gaps and deteriorated sealant.
Try the Paper Test
Open the window and place a sheet of paper between the sash and frame. Close and lock the window.
Gently pull the paper outward. If it slides out easily, the weatherstripping may not provide enough compression.
Repeat this test at several points around the sash. A loose area can reveal where air enters.
Use a Smoke Pencil
A smoke pencil can help identify moving air near window joints. Close the window and move the smoke source slowly along its edges.
Watch whether the smoke moves toward or away from the suspected gap. Strong movement can indicate an air leak.
Avoid using open flames near curtains, blinds, or other combustible materials. A smoke pencil provides a safer testing option.
Check During Rain
Inspect windows during or shortly after rainfall. Look for water entering around the frame or appearing on the interior sill.
Water can travel through wall cavities before becoming visible. The location of an interior stain may not identify the original entry point.
Never assume every water leak needs more caulk. Poor flashing, damaged siding, and roof problems can also direct water toward windows.
Tools and Materials Needed for Window Caulking
Gather your supplies before removing the old sealant. Having everything ready makes the project easier.
Basic tools:
- Caulking gun
- Utility knife
- Caulk removal tool
- Plastic putty knife
- Scraper
- Cleaning cloths
- Mild detergent
- Painter’s tape
- Caulk finishing tool
- Work gloves
- Safety glasses
- Stable ladder, when necessary
Materials:
- Exterior window and door sealant
- Interior paintable caulk
- Replacement weatherstripping
- Low-expansion window and door foam
- Foam backer rod
- Window glazing compound, when appropriate
You won’t need every item for every repair. Choose materials according to the window construction and damaged area.
Which Caulk Is Best for Windows?
Choosing the correct sealant matters as much as applying it properly. Different products work with different materials and conditions.
1. 100% Silicone Caulk
Silicone sealant provides flexible, water-resistant protection. It works well on compatible exterior joints exposed to rain and temperature changes.
However, most 100% silicone products cannot be painted. Check the manufacturer’s instructions before using them on painted trim.
GE Advanced Silicone is one example of a recognizable silicone sealant brand.
2. Siliconized Acrylic Latex Caulk
This type combines acrylic properties with added silicone. Many products offer easier cleanup and paintability.
It can work well on compatible window trim and siding joints. Check its exterior rating and movement capability before purchasing.
DAP and Sashco offer products in the broader window and exterior sealant category.
3. Polyurethane Sealant
Polyurethane sealants can provide strong adhesion and flexible exterior protection. They are useful for certain demanding construction joints.
However, application and cleanup requirements vary. Always confirm compatibility with the window frame and surrounding material.
OSI is one established brand with exterior sealant options.
4. Window Glazing Compound
Glazing compound serves a different purpose from ordinary frame caulk. It holds and seals glass within traditional window sashes.
Older wood windows may need fresh glazing around individual glass panes. Use a glazing product designed for that application.
Do not substitute ordinary bathroom caulk for window glazing.
Important: Read the product label before purchasing any sealant. Confirm its compatibility with vinyl, aluminum, wood, fiberglass, brick, or siding. Also check its paintability and recommended application temperature.
How to Reseal Windows Step by Step
Once you’ve identified the damaged seal, prepare the work area. The following process covers common exterior caulking repairs.
Step 1: Choose a Suitable Day
Choose a dry day with mild temperatures. Avoid working during rain, strong wind, or extreme heat.
Most sealants require specific surface temperatures and curing conditions. Check the manufacturer’s instructions before starting.
A clean, dry surface helps the new sealant adhere properly.
Step 2: Remove the Old Caulk
Inspect the existing sealant before removing anything. Focus on cracked, loose, or deteriorated sections.
Use a plastic scraper or suitable caulk removal tool. Carefully lift away the damaged material.
A utility knife can help with stubborn sealant. Work slowly to avoid scratching the glass or damaging the frame.
Avoid aggressive scraping around painted wood. Older homes may contain lead-based paint.
Step 3: Clean the Window Surface
Remove loose debris, dust, and remaining sealant residue. Clean the joint with a suitable mild cleaning solution.
Follow the sealant manufacturer’s cleaning recommendations. Some materials require a specific surface preparation method.
Allow the area to dry completely before applying new caulk. Moisture and dirt can weaken adhesion.
Step 4: Apply Painter’s Tape
Apply painter’s tape along both sides of the joint. Leave enough space for the desired caulk bead.
Tape helps create cleaner edges around the window frame. It can also reduce cleanup time.
Avoid covering drainage openings or window weep holes.
Step 5: Prepare the Caulk Tube
Cut the cartridge tip at approximately a 45-degree angle. Make the opening slightly smaller than the joint.
Pierce the inner seal if the product requires it. Load the cartridge into the caulking gun.
Follow the manufacturer’s instructions for the correct nozzle opening. A smaller opening provides better control over narrow gaps.
Step 6: Apply a Consistent Bead
Place the nozzle against the joint and squeeze the trigger steadily. Move along the seam at a consistent speed.
Apply enough sealant to fill the gap without creating excessive buildup. Keep the bead continuous wherever the joint requires sealing.
For larger gaps, check whether backer rod is necessary. Caulk alone may not perform properly in an oversized opening.
Step 7: Smooth the Sealant
Use a suitable finishing tool to smooth the bead. Follow the product instructions for tooling and cleanup.
Make sure the sealant contacts both sides of the joint. Remove excess material before it begins curing.
Avoid spreading caulk over nearby drainage openings.
Step 8: Remove Painter’s Tape
Remove the tape while the sealant is still workable. Pull it away carefully to preserve the finished edge.
Do not wait until the sealant becomes fully cured. Tape can become difficult to remove later.
Step 9: Allow Proper Curing
Leave the repaired area undisturbed during curing. Drying time varies by product, joint size, temperature, and humidity.
Some products become surface-dry quickly but need longer to cure completely. Follow the manufacturer’s recommended waiting period before exposing the joint to water or painting it.
Step 10: Inspect the Finished Repair
Examine the entire repaired joint after curing. Look for missed gaps, bubbles, and areas where the sealant has separated.
Repeat your original leak test once the repair is ready. This helps confirm whether the problem has improved.
How to Reseal Windows From the Outside
Exterior window caulking helps protect the joint between the frame and surrounding wall materials.
Start by identifying the existing sealant and the window’s drainage design. Different window systems require different sealing arrangements.
Remove deteriorated caulk from the appropriate stationary joints. Clean and dry the surfaces before applying compatible exterior sealant.
Pay particular attention to vertical joints and the upper frame connections. Follow the window manufacturer’s instructions for the sill and lower corners.
Never blindly caulk every exterior edge. Many windows use designed drainage paths to release water. Blocking these openings can trap moisture inside the assembly.
If water enters around brick, siding, or stucco, inspect the flashing and surrounding construction. Fresh caulk cannot correct missing or damaged flashing.
How to Reseal Windows From the Inside
Interior sealing can help reduce drafts entering around the window frame. It can also improve comfort during colder months.
First, identify whether air enters through the movable sash or the space behind the trim.
For small gaps around stationary interior trim, use compatible paintable caulk. Clean the surface and remove loose material first.
If air enters between the sash and frame, inspect the weatherstripping. Replace damaged material with a compatible replacement.
For deeper gaps behind the trim, additional air sealing may be necessary. ENERGY STAR recommends suitable low-expansion foam, backer rod, or caulk depending on the opening.
Use foam specifically designed for windows and doors. Excessive expansion can distort the frame and interfere with window operation.
How to Reseal Different Types of Windows
Window construction affects the correct repair method. Identify your window type before purchasing replacement materials.
Double-Hung Windows
Double-hung windows have two movable sashes. Air can leak around their edges or where the sashes meet.
Inspect the sash weatherstripping and meeting rail. Replace worn seals with compatible products.
Do not apply permanent caulk between sections that need to move.
Sliding Windows
Sliding windows move horizontally along tracks. Dirt and damaged weatherstripping can interfere with their seals.
Clean the tracks and inspect the sash edges. Replace damaged weatherstripping according to the manufacturer’s specifications.
Keep drainage openings clear during cleaning and repair.
Casement Windows
Casement windows open outward using hinges and a crank mechanism. Their seals usually compress against the frame when closed.
Inspect the perimeter gasket for flattening, tears, or missing sections. Check the locking hardware for proper alignment.
Replace worn gaskets with compatible materials. Adjust faulty hardware when necessary.
Vinyl Windows
Vinyl windows often use factory-installed gaskets and drainage channels. Avoid applying random sealants over moving parts.
Use products specifically approved for the frame material. Follow the manufacturer’s guidance for exterior joints and drainage.
Wood Windows
Wood windows may have separate seals around the glass and exterior frame. Inspect the wood for cracks, peeling paint, and signs of rot.
Traditional single-pane windows may require fresh glazing compound. Damaged exterior joints may also need compatible caulk.
Repair rotten wood before applying new sealant. Caulk cannot restore damaged structural material.
Aluminum Windows
Aluminum frames can develop gaps at stationary joints. They may also have worn gaskets around movable sections.
Choose a sealant compatible with aluminum and adjacent materials. Inspect the frame for corrosion before repairing it.
How to Seal Large Gaps Around Windows
Not every opening should be filled with a thick bead of caulk. Large gaps require a different approach.
Small Gaps
Small stationary gaps can often be filled with compatible window and door sealant. Clean the surfaces before application.
Follow the product’s maximum recommended joint dimensions.
Medium Gaps
Foam backer rod can help support sealant in wider joints. Choose a size that fits without excessive compression.
Install the rod at the recommended depth. Apply sealant over it according to the product instructions.
Large Gaps Behind Window Trim
Larger openings between the window frame and rough opening may need low-expansion foam.
ENERGY STAR recommends foam designed specifically for windows and doors. It also identifies backer rod and caulk as suitable options for certain gaps.
Remove interior trim only if you understand the assembly. Protect surrounding finishes and avoid damaging wiring or other concealed components.
Fiberglass insulation alone does not stop airflow. It needs an appropriate air-sealing layer.
How to Fix a Broken Seal Between Double-Pane Windows
A failed insulated glass seal needs a different repair from ordinary window caulking.
Double-pane windows contain an insulated glass unit, commonly called an IGU. The sealed space between the panes helps reduce heat transfer.
When the factory seal fails, moisture can enter that space. This often produces permanent fogging or condensation between the panes.
Start by cleaning both exposed glass surfaces. Confirm that the moisture remains trapped inside the unit.
Check the window warranty and contact the manufacturer or a qualified glass professional. Depending on the window design, replacing the IGU may be possible without replacing the entire frame.
Do not drill the glass or inject household sealant between the panes. These approaches cannot reliably restore the original insulated glass seal.
Common Window Resealing Mistakes to Avoid
Even a simple repair can fail when homeowners overlook preparation or material compatibility.
Applying New Caulk Over Old Caulk
Fresh sealant may not bond properly to loose or deteriorated material. Remove failed caulk and prepare the surface first.
Using the Wrong Sealant
Not every caulk works with every frame material. Check compatibility, paintability, and exterior exposure ratings.
Sealing Moving Window Parts
Caulk is designed for stationary joints. Use suitable weatherstripping around movable sashes.
Blocking Window Weep Holes
Some window frames use small drainage openings to release water. Blocking them can cause moisture accumulation.
Ignoring Rotten Wood
New sealant cannot repair decayed framing or damaged trim. Correct the underlying damage before resealing.
Applying Caulk to Wet Surfaces
Many sealants require clean, dry surfaces. Moisture can interfere with adhesion and curing.
Applying Too Much Sealant
An oversized bead looks messy and may perform poorly. Choose the correct nozzle opening and apply a controlled amount.
Ignoring the Original Leak Source
Water around a window may come from damaged flashing, siding, or roof components. Investigate the surrounding construction before assuming caulk is the solution.
How Much Does It Cost to Reseal Windows?
Window resealing costs depend on the repair type, materials, and labor.
A basic DIY caulking project usually costs less than repairing a failed insulated glass unit. Replacing weatherstripping also has different material and labor requirements.
Here are the main factors that influence the total cost:
- Number of windows requiring repair
- Amount of old caulk that needs removal
- Type and quantity of sealant
- Window frame material
- Accessibility of exterior windows
- Extent of water damage or wood rot
- Need for professional glass or window repair
For a small DIY project, you may only need a caulk tube and basic tools. Larger repairs can require additional supplies or professional assistance.
Request an itemized estimate when hiring a contractor. Ask whether the quote includes materials, labor, surface preparation, and cleanup.
Do not compare quotes without checking what each repair includes.
How Long Does Window Caulking Last?
The lifespan of window caulk depends on its quality, installation, exposure, and surrounding materials.
Sunlight, temperature changes, moisture, and building movement can affect the seal. Poor surface preparation can also cause early separation.
Inspect exterior caulk periodically, especially before seasons with heavy rain or extreme temperatures.
Replace deteriorated sections when necessary. Avoid adding new layers over failing sealant.
There is no universal replacement schedule for every window. The product, climate, and installation details all matter.
When Should You Hire a Window Professional?
Some window repairs are not suitable for ordinary DIY work.
Contact a qualified professional if you notice:
- Persistent fog between double-pane glass.
- Extensive wood rot around the window.
- Water entering behind the wall or interior trim.
- Damaged flashing or structural framing.
- Cracked or unstable window glass.
- Windows that no longer close or lock correctly.
- Difficult exterior access or unsafe working conditions.
Older homes require additional care. Homes built before 1978 may contain lead-based paint.
Scraping or disturbing old paint can create hazardous lead dust. The EPA recommends lead-safe practices and encourages homeowners to hire certified professionals for relevant renovation work.
Never use aggressive sanding or uncontrolled scraping on suspected lead-painted surfaces.
Frequently Asked Questions
Can you reseal windows without removing them?
Yes. Many exterior frame joints and interior gaps can be repaired without removing the window. The correct method depends on the damaged seal.
Should I reseal windows from the inside or outside?
It depends on the source of the leak. Exterior caulk addresses suitable stationary exterior joints. Interior caulk can seal certain gaps around trim.
Weatherstripping is usually better for movable window sections. Some repairs require attention from both sides.
Can I use silicone to reseal windows?
Yes, when the product is compatible with the window and surrounding materials. Silicone works well for many weather-exposed joints.
However, many silicone products cannot be painted. Check the label before purchasing.
Is window caulking better than weatherstripping?
Neither is universally better. Caulk seals stationary joints, while weatherstripping seals movable components.
Using the correct material for each location produces a more reliable repair.
How do I stop cold air coming through my windows?
First, locate the source of the draft. Replace damaged weatherstripping or seal suitable stationary gaps.
For deeper openings, appropriate air-sealing materials may be necessary. Insulating window film can also provide temporary seasonal protection.
Why do my windows fog up between the glass panes?
Fog trapped between double-pane glass usually indicates a failed insulated glass seal. Moisture has entered the sealed space.
Exterior caulk cannot repair the internal glass unit. A glass professional can assess replacement options.
Can I apply new caulk over existing window caulk?
It is generally better to remove failed caulk first. New sealant needs a suitable surface for proper adhesion.
Follow the product manufacturer’s instructions for surface preparation.
Do I need to caulk the bottom of exterior windows?
Not necessarily. Some window systems have drainage paths along the bottom.
Follow the manufacturer’s installation instructions. Never cover weep holes or other designed drainage openings.
What is the best temperature for window caulking?
The correct temperature depends on the sealant. Check the manufacturer’s application range before starting.
Avoid applying caulk outside its recommended temperature and moisture conditions.
How can I tell whether my window needs replacement?
Consider replacement when the frame has extensive damage, the window cannot operate safely, or repairs cannot restore its performance.
A failed insulated glass unit alone does not always require a complete window replacement. Ask a qualified professional about replacement options.
Final Thoughts
Learning how to reseal windows can help homeowners solve common drafts and moisture problems. The key is identifying the damaged seal before choosing a repair method.
Use caulk for suitable stationary joints and weatherstripping for movable sections. Choose compatible products and prepare every surface properly.
Remember that failed insulated glass seals need a different solution. Damaged flashing and rotten frames also require more than fresh caulk.
A careful inspection and suitable repair can help extend the useful life of your existing windows. Take your time, follow product instructions, and seek professional help when the damage goes beyond a simple sealing project.